Installation & First Setup
Download, install, and configure Network Backup Manager for the first time
Step 1: Download Network Backup Manager
First, you need to download the latest version of Network Backup Manager from our secure download page. The installer works on Windows 10/11 and Windows Server systems.
Make sure you have a valid license key ready - you'll need it during the setup process to unlock all features.
Download the latest version from the secure download area
Step 2: Run the Installer
Once downloaded, run the installer file as a normal user - Administrator permissions are not required. The installation wizard will guide you through the process.
Choose your installation directory and let the installer complete. This usually takes 1-2 minutes depending on your system.
The installation wizard - no administrator rights needed
Step 3: First Launch & License Activation
After installation, launch Network Backup Manager. You'll be prompted to enter your license key on the first run. This activates all features and enables unlimited device management.
The license activation requires a one-time internet connection to our licensing server for verification.
Enter your license key to unlock all features
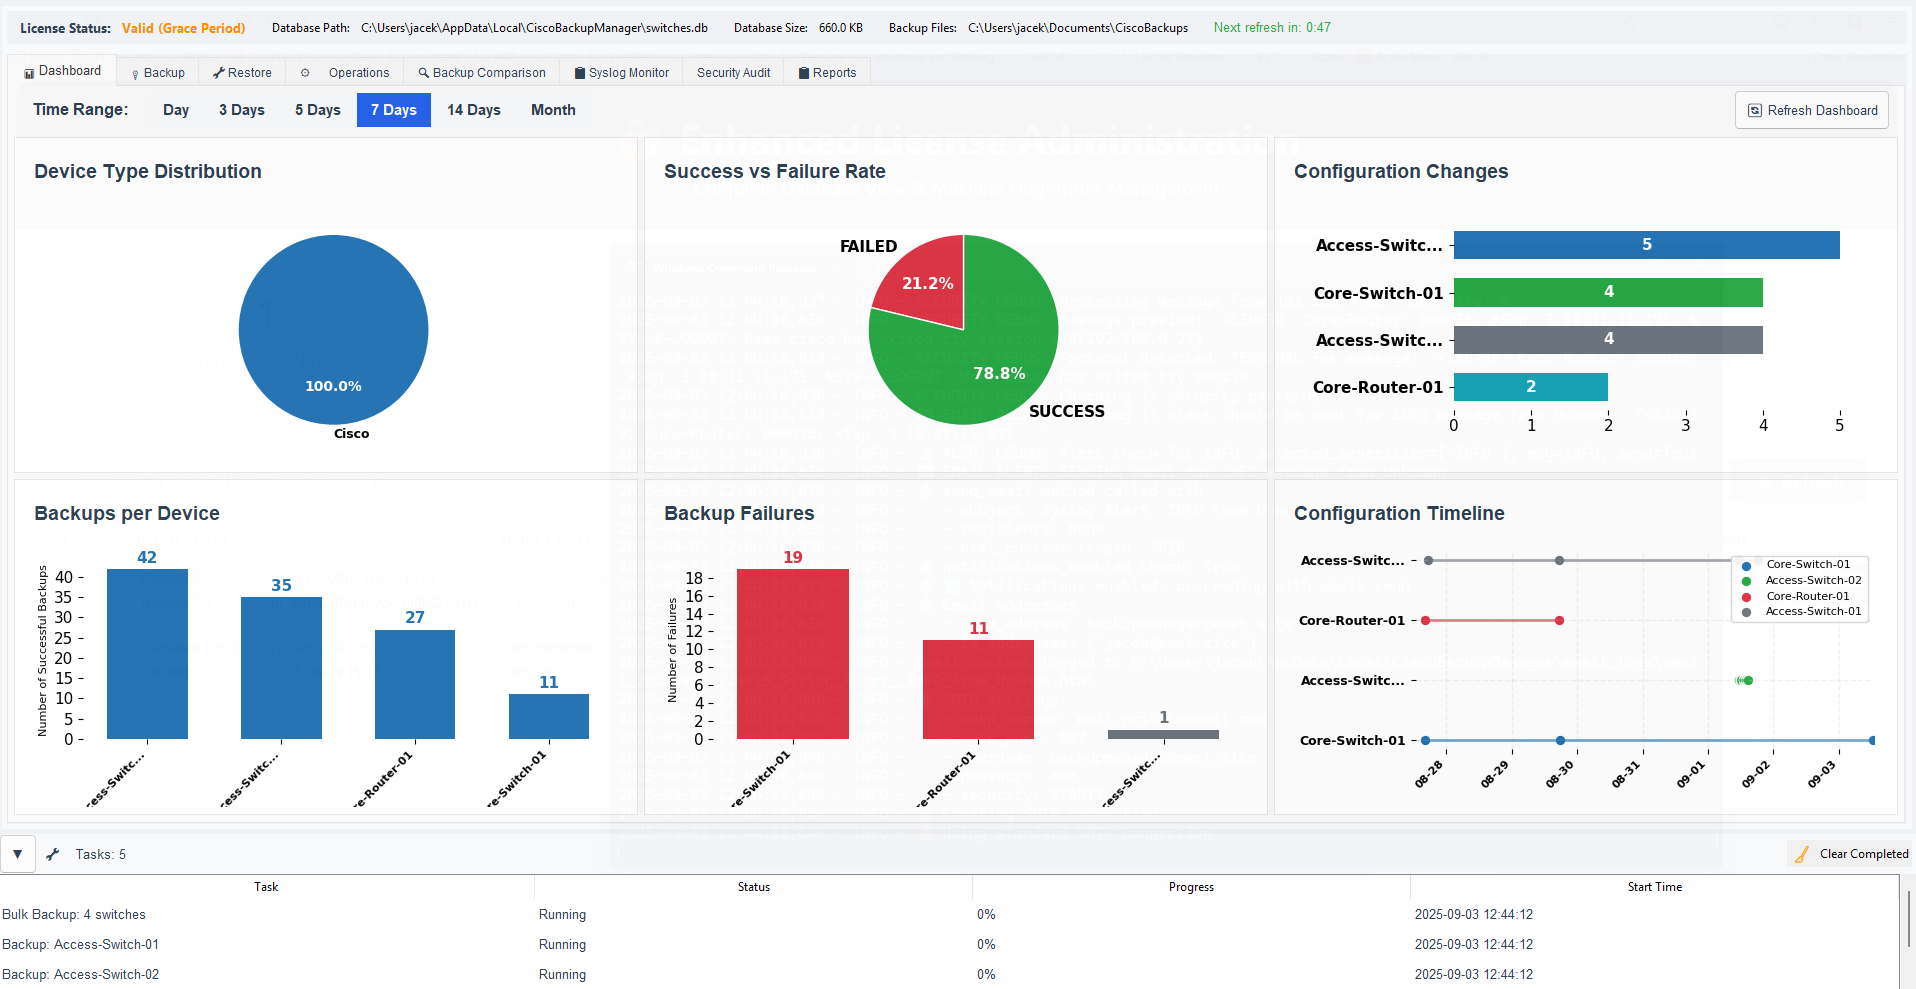
Step 4: Initial Configuration
Once licensed, you'll see the main dashboard. The first thing to do is change the default admin password and configure basic settings like email notifications.
Navigate to the Settings section to update your admin password and configure SMTP settings for email alerts.
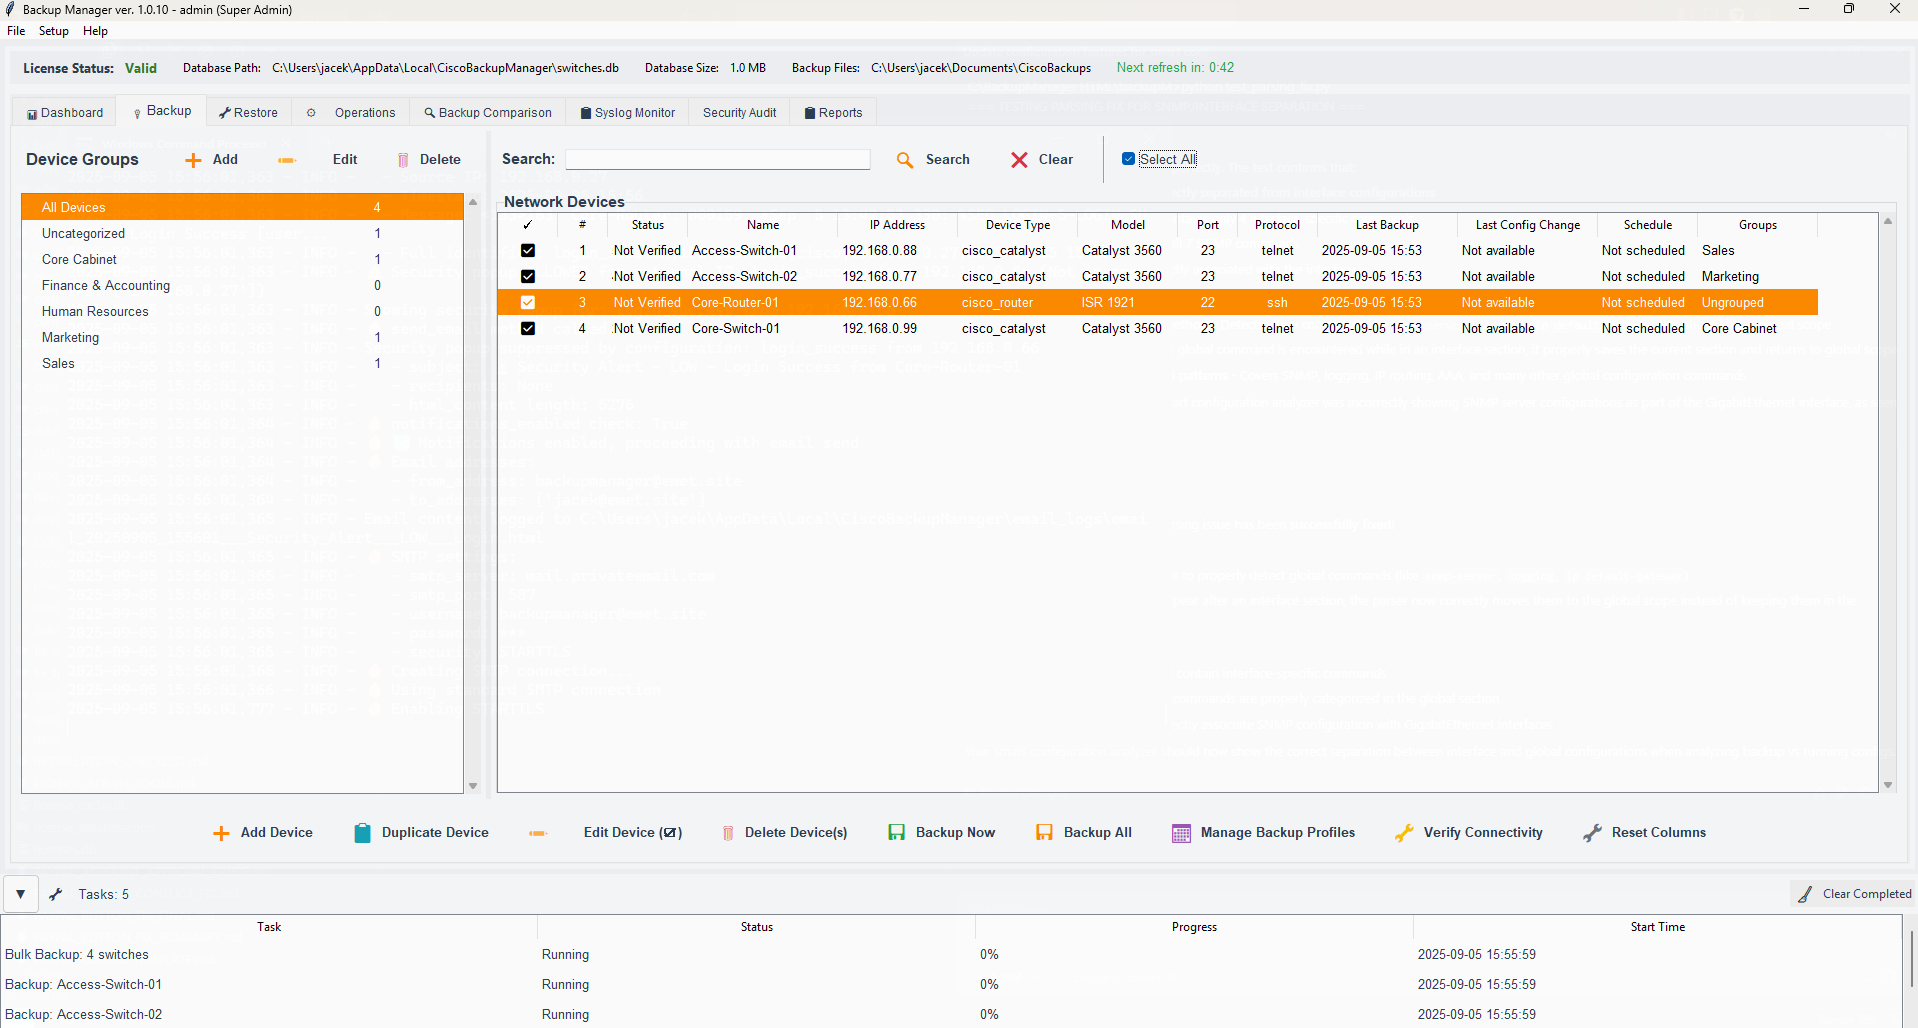
Main dashboard - ready for device configuration
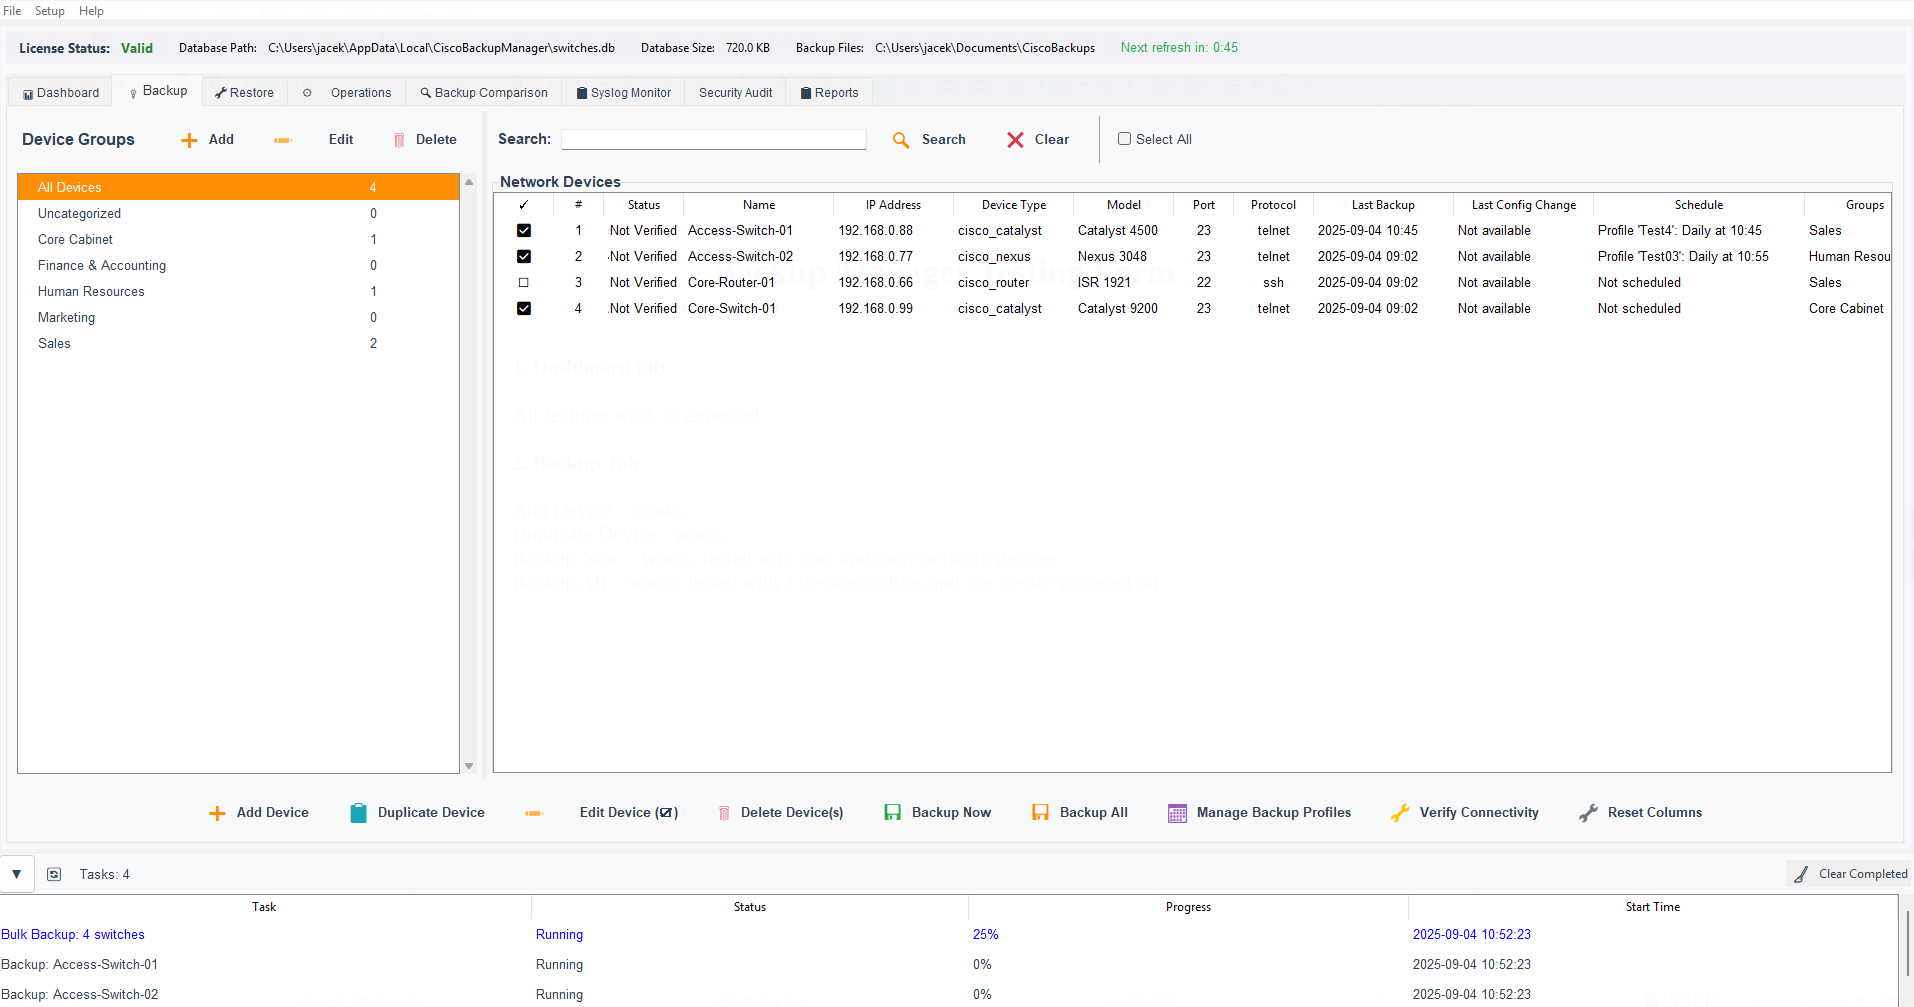
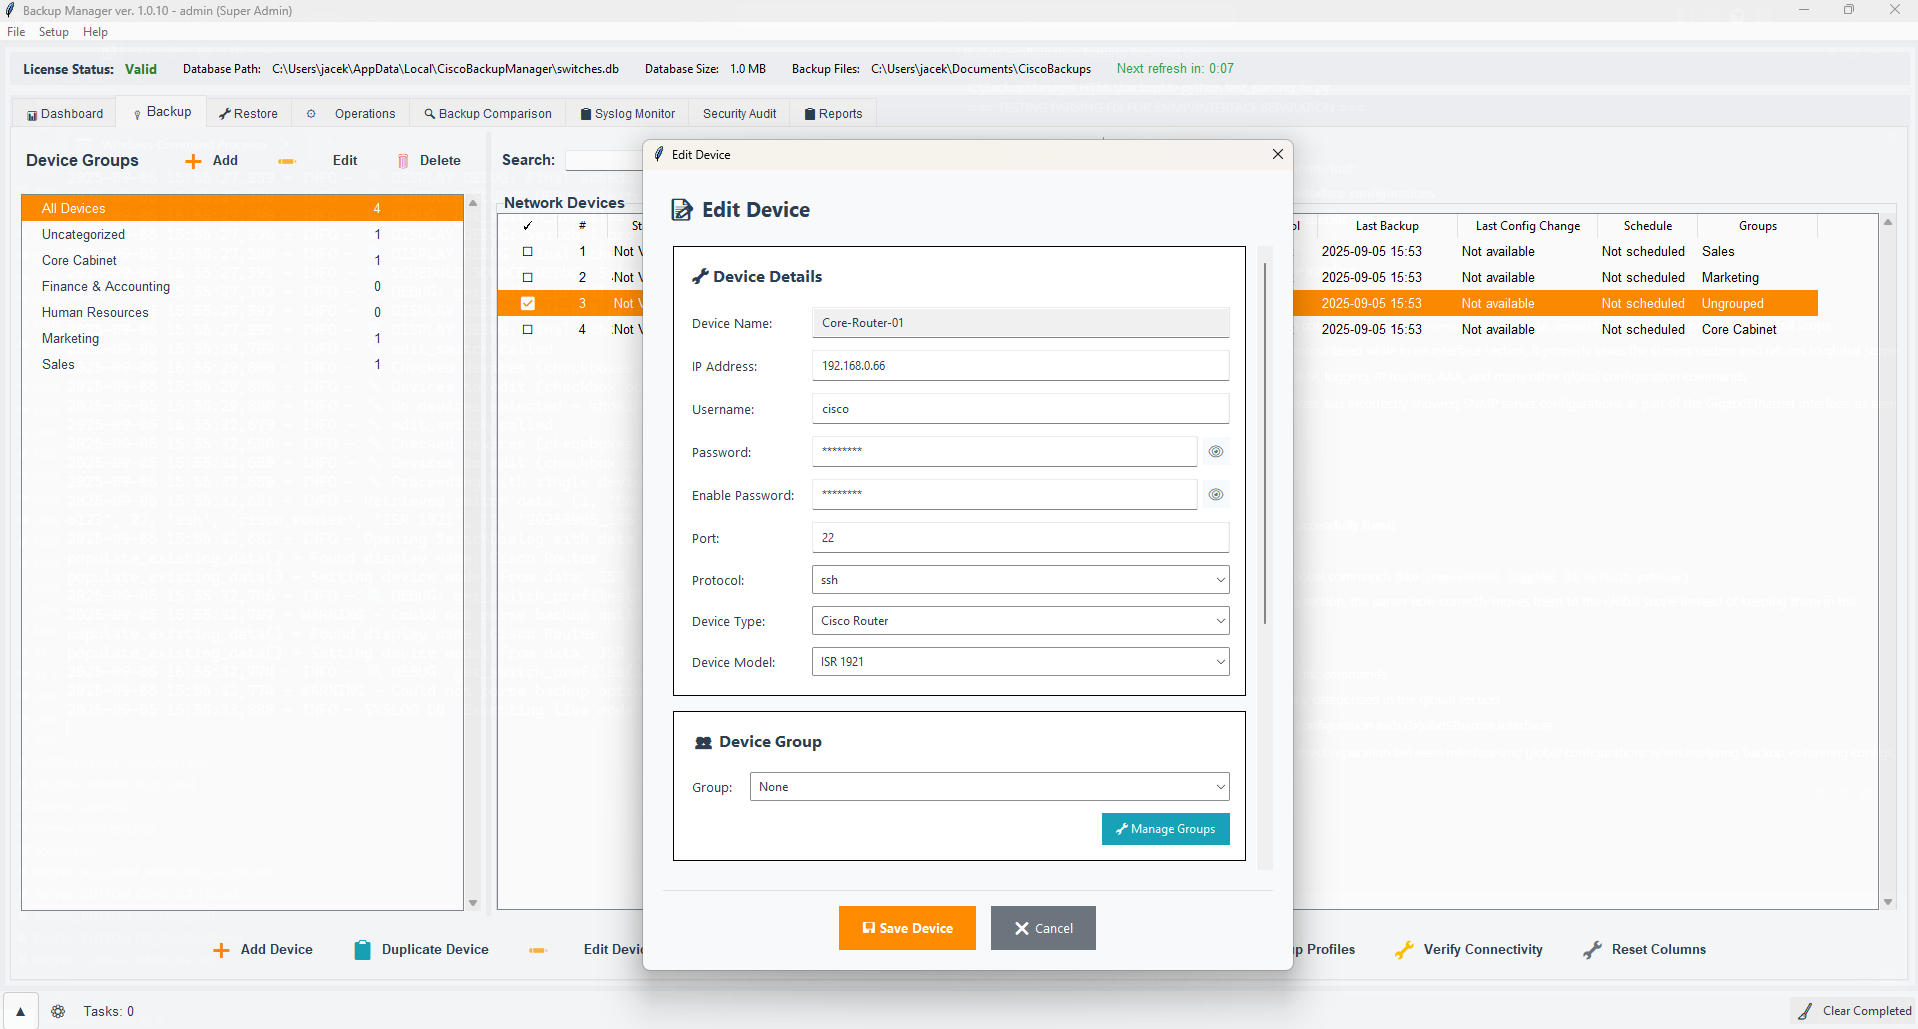
Step 5: Add Your First Device
Now you're ready to add your first network device! Click on the "Backup" tab and then "Add Device" to start adding your network equipment.
You'll need the device's IP address and valid SSH or Telnet credentials. The system will test connectivity before adding the device.
Add Device screen - enter IP and credentials
Congratulations!
You've successfully installed and configured Network Backup Manager. You're now ready to start managing your network devices with automated backups, security monitoring, and more.